Views: 0 Author: Site Editor Publish Time: 2025-10-23 Origin: Site


Ever wondered how to hang a solar wall light on brick without stress or damage? I have faced the same challenge. I know you want a hassle-free way to brighten your outdoor space. No-drill options like brick clips or adhesive strips work fast and keep your wall intact. Drill methods give a rock-solid hold you can trust for years. Your wall type and needs matter most. With the right approach, anyone can get great results—even if you have never done it before.
Choose the right method for hanging solar lights: no-drill options like brick clips and adhesive strips are quick and easy, while drill methods provide a secure, long-lasting hold.
Gather essential tools and materials before starting. Use masonry drill bits, anchors, and screws for drill methods, or heavy-duty adhesive strips for no-drill methods.
Select a location with plenty of direct sunlight. Ensure the solar panel receives at least six hours of sun for optimal performance at night.
Inspect the brick wall for cracks or loose bricks. A stable surface is crucial for securely mounting solar lights.
Use a level to mark mounting points accurately. This ensures your lights are straight and enhances the overall appearance.
Regularly clean the solar panel to maintain charging efficiency. Dirt and debris can block sunlight and reduce performance.
Seal any drilled holes with outdoor-grade silicone to prevent water and pests from damaging the brick wall.
Test the light after installation to ensure it works properly. Adjust the solar panel for maximum sunlight exposure.
Before I start hanging a solar wall light on brick, I gather the right tools and materials. The right gear makes the job smoother and helps me avoid mistakes. I want my lights to stay secure and look great, so I never skip this step.
If I choose the drill method, I reach for a power drill. I always use a masonry drill bit because it cuts through brick or mortar without wearing out fast. For most solar wall light installations, a 3/16" (5mm) masonry bit works perfectly. I double-check the bit size to match my anchors. This way, the holes fit snugly and hold strong.
Masonry drill bit (3/16" or 5mm recommended)
Power drill (hammer drill for tough brick)
Extra bits in case one dulls or breaks
Tip: I use a hammer drill for older or harder bricks. It saves time and effort.
I want my solar wall light to stay put, so I pick anchors and screws made for brick. Here’s what I use:
Sleeve anchors (1/4" to 3/4" diameter)
Concrete screws (Tapcon, 3/16" to 3/4" diameter)
Hammer drive anchors (1/4" diameter)
Stainless steel or zinc-coated screws and hooks (for rust resistance)
Masonry anchors or sleeve anchors for a solid grip
I also keep a rubber-head hammer handy. It lets me tap anchors in without cracking the brick. A screwdriver helps me tighten screws without stripping them.
Tool/Material | Purpose |
|---|---|
Sleeve anchors | Secure hold in brick |
Concrete screws | Self-tapping, easy install |
Hammer drive anchors | Great for lighter fixtures |
Rubber-head hammer | Tap anchors gently |
Screwdriver | Tighten screws and hooks |
If I want a fast, no-damage option, I use no-drill supplies. These work well for renters or anyone who wants to avoid holes.
Brick clips grip the edges of bricks. They don’t damage the wall or leave marks. I use them on bricks with clear, sharp edges. They hold surprisingly well and come off clean.
Heavy-duty adhesive strips or hooks work on flat brick surfaces. I look for outdoor-rated, weather-resistant brands. These hold up in rain and sun. I always check the weight rating to match my solar wall light.
Note: I clean the brick surface before sticking adhesive strips. This helps them bond better and last longer.
Other Handy Tools:
Tape measure or folding ruler (for even spacing)
Pencil or chalk marker (marks wipe off easily)
Level or laser level (keeps lights straight)
UV-resistant zip ties or outdoor clips (tidy up wires)
Silicone sealant or weatherproof caulk (seals around anchors)
With these tools and materials, I feel confident to tackle any brick wall. I know my solar wall light will stay secure and shine bright.
Selecting the right spot for my solar wall light makes all the difference. I want my light to shine bright, stay secure, and last for years. Here’s how I choose the best location every time.
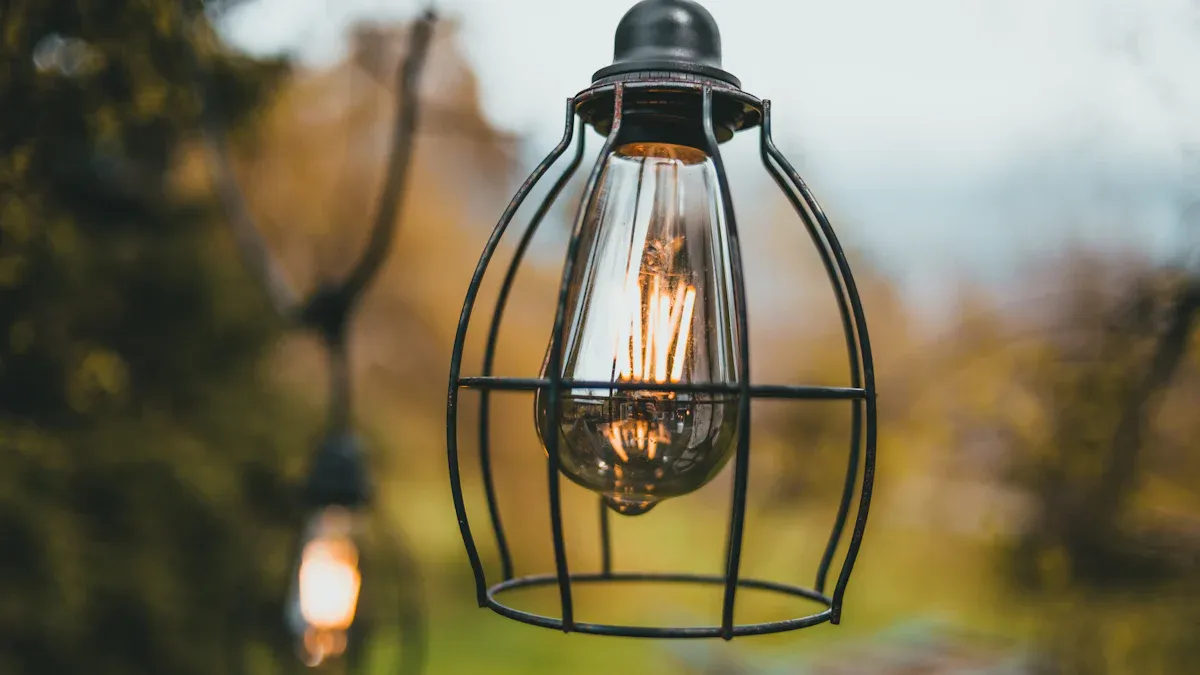
I always look for a spot that gets plenty of direct sunlight. The more sun my solar wall light receives, the better it performs at night. I avoid shaded areas under eaves, trees, or awnings. Sunlight powers the solar panel and charges the battery. If I pick a spot with lots of shade, my light will not shine as long or as bright. I check the wall at different times of day to see where the sun hits most. I want to make sure the panel gets at least six hours of direct sunlight. This step boosts the efficiency and reliability of my solar wall light.
Tip: I use my phone’s compass or a sunlight tracking app to find the sunniest spot on my brick wall.
Before I install anything, I inspect the brick wall closely. I look for cracks, loose bricks, or signs of wear. I want a strong, stable surface for my solar wall light. If I see weak spots, I avoid them or reinforce the area first. I also check that the wall can handle the weight of the fixture, especially if I live in a windy area. I make sure my mounting hardware meets local building codes. Safety comes first, so I always double-check before I start.
I check for cracks or loose bricks.
I reinforce any weak spots.
I make sure the wall can support the light.
I use hardware that meets safety standards.
I plan to inspect the mount regularly after installation.
Note: If I ever mount on a conductive surface, I consider grounding the fixture for extra safety.
Getting the placement right matters. I measure the distance between the mounting holes on my solar wall light. I use a tape measure and mark the spots on the brick wall with a pencil or chalk. I grab a level to make sure my marks are straight. Uneven lights look sloppy, so I double-check everything before I drill or stick anything to the wall.
I measure and mark the mounting points.
I use a level to keep the marks straight.
I double-check all measurements before moving forward.
Taking time to choose the perfect location pays off. My solar wall light will shine brighter, last longer, and look great on my brick wall.
I love using no-drill methods when I want to hang a solar wall light quickly and avoid making holes in my brick wall. These options save time, protect the wall, and let me change my setup whenever I want. Let me walk you through my favorite no-drill solutions.
Brick clips make hanging a solar wall light on brick simple and fast. I use them when my bricks have clear, defined edges. They grip the brick tightly and leave no marks behind. Here’s how I do it:
I hook the bottom of the brick clip under the lower edge of the brick with my fingers.
I stretch the top of the clip up and hook it over the top edge of the brick using my thumb.
I make sure the clip feels snug and secure.
I hang my solar wall light from the hook or loop on the clip.
Tip: I always check that the brick is not loose before attaching the clip. A solid brick gives the best hold.
Brick clips work best for lightweight to medium-weight lights. I can remove them anytime without tools or damage. If I want to move my solar wall light, I just unclip and reposition.
Adhesive strips offer another fast, no-drill way to mount a solar wall light. I choose heavy-duty, outdoor-rated strips for the best results. I always clean the brick surface first to help the adhesive stick.
I peel off the backing, press the strip firmly onto the back of my solar wall light, and then press the light onto the brick. I hold it in place for about 30 seconds. The adhesive bonds quickly, and my light stays put.
Here’s a quick look at the pros and cons:
Advantages | Disadvantages |
|---|---|
Quick installation | May become loose over time |
No need for drilling or screws | Potential wall damage upon removal |
Saves time | |
Removable | |
Cost-effective |
Note: I always check the weight rating on the adhesive strips. I use them for lighter solar wall lights to avoid any risk of falling.
Adhesive strips let me avoid tools and mess. If I ever want to remove my light, I can peel the strip off. Sometimes, a little residue stays behind, but I can clean it up with soap and water.
Hot glue gives me another way to attach a solar wall light to brick without drilling. I use a strong, outdoor-rated hot glue stick for the best hold. This method works well for temporary setups or lightweight lights.
Hot glue gives a secure hold on brick without causing damage.
I use it for hanging lights on brick, concrete, or stone.
Hot glue dries quickly, so I can finish my project fast.
I can remove the glue later without leaving marks on the masonry.
This method works in both hot and cold weather.
I avoid using hot glue on stucco or very rough surfaces.
To use hot glue, I plug in my glue gun and let it heat up. I apply a generous amount of glue to the back of my solar wall light, then press it firmly onto the brick. I hold it in place for about 30 seconds until the glue sets.
Tip: I test the hold by gently tugging on the light after the glue dries. If it feels loose, I add a bit more glue.
Hot glue lets me skip anchors and screws. I can remove the light later by gently twisting it off. Any leftover glue peels away easily.
No-drill methods give me flexibility and speed. I can hang a solar wall light on brick in minutes, move it whenever I want, and keep my wall looking great. If I want a fast, damage-free solution, these options always deliver.
I always start by marking the exact spots where I want to install my solar wall light. I measure the distance between the mounting holes on the fixture. I use a pencil or chalk to mark these points on the brick. I grab my level to make sure everything lines up straight. This step helps me avoid crooked lights and keeps my outdoor space looking sharp.
Safety matters to me. I follow these steps every time I drill into brick:
I locate any studs in the wall before drilling. This gives my solar wall light a secure base.
I choose a drill bit that is slightly smaller than my screws. This creates a tight fit and prevents damage.
I keep my mounting screws at least one foot away from any electrical wiring. I never want to risk hitting wires.
I avoid drilling directly into mortar joints. Mortar is softer and can crack easily.
Tip: I always use pilot holes when drilling. Pilot holes make the process smoother and reduce the chance of damaging the brick.
I set my hammer drill to a low speed. I drill slowly and steadily, letting the bit do the work. I stop as soon as I reach the right depth. I clean out any dust from the holes with a brush or a blast of air.
Anchors give my solar wall light a strong, lasting hold. I pick the right anchor for my wall and the weight of my fixture. Here’s a quick guide to the best anchor types for brick:
Anchor Type | Description |
|---|---|
Drop-in anchors | Internally threaded. Designed for concrete but work in thick stone. High pullout and shear resistance. Require a special setting tool. |
Wedge and sleeve anchors | Heavy-duty fasteners for high-load jobs. Expand against the sides of the hole for a secure grip. Perfect for attaching heavy equipment to masonry. |
I tap the anchor gently into the drilled hole with a rubber-head hammer. I make sure the anchor sits flush with the wall. I check that it feels solid before moving on.
Note: I never force the anchor into the hole. If it feels too tight, I clean out the hole or use a slightly larger bit.
With the anchors in place, I position the mounting bracket for my solar wall light over the holes. I line up the bracket with my marks. I insert the screws through the bracket and into the anchors. I tighten each screw with a screwdriver until the bracket feels secure. I check that the bracket sits flat against the brick and does not wobble.
I always double-check the stability before attaching the fixture. A solid bracket means my solar wall light will stay put, even in strong winds or heavy rain.
Tip: I use stainless steel or zinc-coated screws. These resist rust and keep my installation looking good for years.
I feel confident every time I follow these steps. My solar wall light shines bright and stays secure, giving me peace of mind and a beautiful outdoor space.
Now comes the most satisfying part—attaching the solar wall light to the bracket. I always make sure the bracket feels secure before I move forward. I grab my fixture and line it up with the mounting bracket. Most solar wall lights have a simple hook, slot, or screw system for attachment. I follow these steps to get a perfect fit every time:
I hold the solar wall light close to the bracket and check the alignment.
I slide or hook the fixture onto the bracket as the instructions show.
I tighten any screws or fasteners that came with the light. I use a screwdriver or the tool provided in the package.
I gently tug on the fixture to make sure it feels stable and does not wobble.
Tip: I always double-check that the solar panel faces the sun. This step helps the battery charge fully during the day.
If my solar wall light has adjustable panels, I tilt or rotate them for the best sunlight exposure. I want the panel to get at least six hours of direct sun. I also check that the light points where I want it—over a walkway, patio, or garden feature.
Sometimes, I need to connect a wire or flip a switch to turn the light on. I read the instructions to make sure I do not miss anything important. I test the light by covering the solar panel with my hand. If the light turns on, I know everything works.
Here is a quick checklist I use before I finish:
The fixture sits flush against the wall.
All screws and fasteners feel tight.
The solar panel faces direct sunlight.
The light turns on when I test it.
Note: I avoid overtightening screws. Too much force can crack the fixture or damage the bracket.
When I finish, I step back and admire my work. The solar wall light looks great and feels secure. I know it will brighten my outdoor space for years.
Once I finish mounting my solar wall light, I never skip the final step—adjusting and testing. This step makes sure my light works at its best and stays secure for the long haul. Let me show you how I get the most out of my solar wall light.
I always start by checking the solar panel. The right angle makes a huge difference in how much sunlight the panel collects. I look for the spot on my wall that gets the most direct sun during the day. I tilt or rotate the panel so it faces the sun as much as possible. If my solar light has an adjustable panel, I use that feature to fine-tune the angle. I want the panel to soak up at least six hours of sunlight every day. This step keeps my light shining bright all night.
Tip: I check the panel’s position every season. The sun’s path changes, so a quick adjustment can boost performance.
A secure fixture gives me peace of mind. I always test the stability of my solar wall light after installation. I use a simple checklist to make sure everything feels solid:
I gently tug on the fixture to check for any movement.
I inspect the anchors and screws to make sure they are tight.
I look for gaps between the bracket and the wall.
I reinforce the base with concrete or expanding foam if I want extra strength.
I use anchoring screws or pegs for a permanent hold.
I consider adding a small fence or barrier if the area gets a lot of foot traffic.
If I notice any wobble, I tighten the screws or add more support. I want my solar wall light to stay put, even in strong winds or heavy rain.
Note: A stable fixture lasts longer and keeps my wall looking great.
Now comes the fun part—testing the light. I cover the solar panel with my hand to simulate nighttime. The light should turn on right away. If it does not, I check the battery connection or make sure the panel got enough sun. I also test the brightness and coverage area. I walk around my yard to see how well the light covers my walkway or patio.
Here’s a quick table I use to track my test results:
Test Step | What I Look For | Action if Needed |
|---|---|---|
Light turns on | Immediate response | Check battery/panel |
Brightness | Even, strong light | Adjust panel angle |
Coverage area | Lights up target space | Move fixture if needed |
If I want the light to stay on longer, I make sure the panel gets more sun or adjust the angle again. I repeat these steps until I am happy with the result.
Pro Tip: I test my solar wall light at night for the best results. Real darkness shows me how well the light performs.
By taking time to adjust and test, I make sure my solar wall light works perfectly and stays secure. I get the best brightness, coverage, and reliability—every single night.
Keeping my solar wall lights in top shape means I get the best performance every night. I want my lights to shine bright, last long, and stay secure on my brick wall. Here’s how I handle maintenance and fix common problems.
A clean solar panel makes all the difference. Dirt, dust, or leaves can block sunlight and reduce charging power. I make cleaning a regular habit. Here’s my go-to routine:
I use a soft brush or microfiber cloth. This prevents scratches on the panel surface.
I mix a mild detergent with water for stubborn spots. I avoid harsh chemicals that could damage the panel.
I never use abrasive sponges or pressure washers. These can crack or cloud the panel.
I rinse with clean water. If I want a spotless finish, I use filtered water to avoid streaks.
For hard-to-reach panels, I use a water-fed pole system. This lets me clean safely from the ground.
Tip: I clean my solar panels every few months, or more often if I notice dust or pollen buildup.
I want my solar wall lights to stay secure, no matter the weather. Regular checks help me catch problems early. Here’s what I do:
I inspect all mounts, clips, and brackets for signs of rust or wear.
I tighten any loose screws or fasteners. A quick twist with a screwdriver keeps everything snug.
I check for corrosion on electrical connections. If I see any, I clean it off and apply a protective spray.
I look for cracks or movement in the brick around the mounts. If I spot damage, I reinforce the area or move the fixture.
Maintenance Task | How Often | Why It Matters |
|---|---|---|
Clean solar panel | Every 2-3 months | Keeps charging efficient |
Check mounts | Monthly | Prevents falls or damage |
Inspect wiring | Every season | Stops corrosion issues |
Note: Secure mounts mean my lights stay put, even in storms or high winds.
Sometimes, my solar wall lights don’t work as expected. I don’t panic—I troubleshoot step by step:
I check the solar panel for dirt or obstructions. Even a thin layer of dust can block sunlight.
I test the battery. If the light seems dim or doesn’t turn on, I replace the battery or check the connections.
I make sure all wires and connectors are tight and free from corrosion.
I review the manufacturer’s instructions for specific troubleshooting tips.
If I still have trouble, I reach out to customer support. Most issues have simple fixes, and a quick check keeps my lights glowing strong.
Pro Tip: Regular maintenance saves me time and money. My solar wall lights stay bright, reliable, and ready to light up my outdoor space.
When I install solar lights on brick walls, I want to protect both my lights and my home. Over time, I have learned a few best practices that keep my brick looking great and my lights shining bright. Let me share my top tips so you can get the best results, too.
I always avoid drilling into mortar joints. Mortar is much softer than brick. It does not hold screws as well, and it can crack or crumble over time. If I drill into mortar, I risk weakening the wall and making my solar lights unstable. Instead, I target the solid brick for any drilling or mounting. This gives my lights a stronger, longer-lasting hold.
Mortar joints are weaker than brick.
Drilling into mortar can damage the wall’s structure.
Screws in mortar may loosen, risking the stability of my solar lights.
Tip: I use a pencil to mark my drill points directly on the brick, never on the mortar. This simple step keeps my wall strong and my lights secure.
After I finish installing my solar lights, I always seal any holes around the fixture. This step keeps out water, bugs, and dust. It also helps prevent long-term damage to the brick. Here is my go-to method for sealing holes:
I clean the area around the fixture with a damp rag. A spotless surface helps the sealant stick.
I cut the tip of my silicone sealant tube at a 45-degree angle. This makes it easier to apply.
I puncture the inner foil seal of the tube.
I load the tube into my caulk gun.
I apply a steady bead of silicone sealant around the fixture on the brick wall.
I smooth the silicone with my finger or a tool for a tight seal.
I refasten the fixture to the wall with screws.
I let the silicone cure for at least 30 minutes.
Note: I always use outdoor-grade silicone sealant. It stands up to rain, sun, and temperature changes.
I take extra steps to prevent damage during installation and removal. I want my brick wall to look as good as new, even after years of use. Here is what I do:
I locate studs in the wall before drilling. This gives my solar lights a stable base.
I plan the direction and spacing of my lights. Even spacing avoids harsh spots and gives a balanced look.
I connect the solar panel to the fixture by twisting the wires together, following the instructions.
I secure the solar panel with heavy-duty stakes if I mount it on the ground, making sure it faces south for the best sunlight.
Pro Tip: I always double-check my work before finishing. Careful planning and gentle handling keep my brick wall in top shape.
By following these tips, I protect my brick wall and get the most out of my solar lights. I encourage you to use these steps for a safe, long-lasting installation that keeps your home looking its best.
I can hang solar wall lights on brick using two main methods: no-drill options for quick, easy changes, or drill-and-anchor for a permanent hold. The right tools, a sunny spot, and regular cleaning keep my lights shining bright. I always pick the method that fits my needs best. If I follow these steps, I get a secure, long-lasting result every time.
Ready to light up your brick wall? Start today and enjoy a brighter outdoor space!
I always check for solid, undamaged bricks. I avoid loose or crumbling areas. If my wall feels sturdy and shows no cracks, I feel confident to hang solar lights.
Yes! I use brick clips or adhesive strips for easy removal. These options leave my wall looking clean. I avoid drilling if I want a damage-free solution.
I check the solar panel for dirt. I make sure the battery connects properly. I test the light by covering the panel. If it still does not work, I replace the battery.
I always drill into brick, not mortar. Brick holds screws better and keeps my lights secure. Mortar can crack or crumble, so I avoid it for a lasting hold.
I clean the solar panel every few months. I check mounts for tightness. I make sure the panel faces direct sunlight. Regular care keeps my lights working their best.
Yes! I use similar steps for stone, concrete, or stucco walls. I always check the surface and choose the right mounting method for the material.
I grab brick clips, heavy-duty adhesive strips, or outdoor-rated hot glue. I also use a tape measure and level for perfect placement. No power tools needed!
I seal around the fixture with outdoor-grade silicone. This keeps water, bugs, and dust out. My wall stays protected, and my lights last longer.


 English
