Views: 0 Author: Site Editor Publish Time: 2025-10-24 Origin: Site


I love using a solar wall light because it makes outdoor lighting simple and smart. I just mount it, let the sun do its job, and enjoy automatic light every night. When I switched to solar, I saw real energy savings and felt good about reducing my carbon footprint. Solar lights run on renewable energy, so I help the planet every time I light up my yard. I avoid the pollution and waste that come from old-fashioned bulbs. Making the switch feels easy and rewarding.
Solar wall lights are easy to install and operate, providing automatic lighting that saves energy and reduces your carbon footprint.
Inspect all components for damage before installation to ensure your solar lights work properly and last longer.
Choose a location with direct sunlight for at least 6 to 8 hours daily to maximize charging and performance.
Select the right mounting method based on your wall type, considering screws for permanence, hooks for flexibility, and stickers for quick setups.
Charge your solar lights fully before first use, allowing 6 to 12 hours of sunlight to ensure optimal battery life.
Adjust the sensor and light settings to match your needs, using motion detection for security and different modes for energy savings.
Regularly clean the solar panel and check the battery to maintain brightness and reliability throughout the seasons.
Follow seasonal maintenance tips to adapt your solar lights to changing weather conditions, ensuring they perform well year-round.
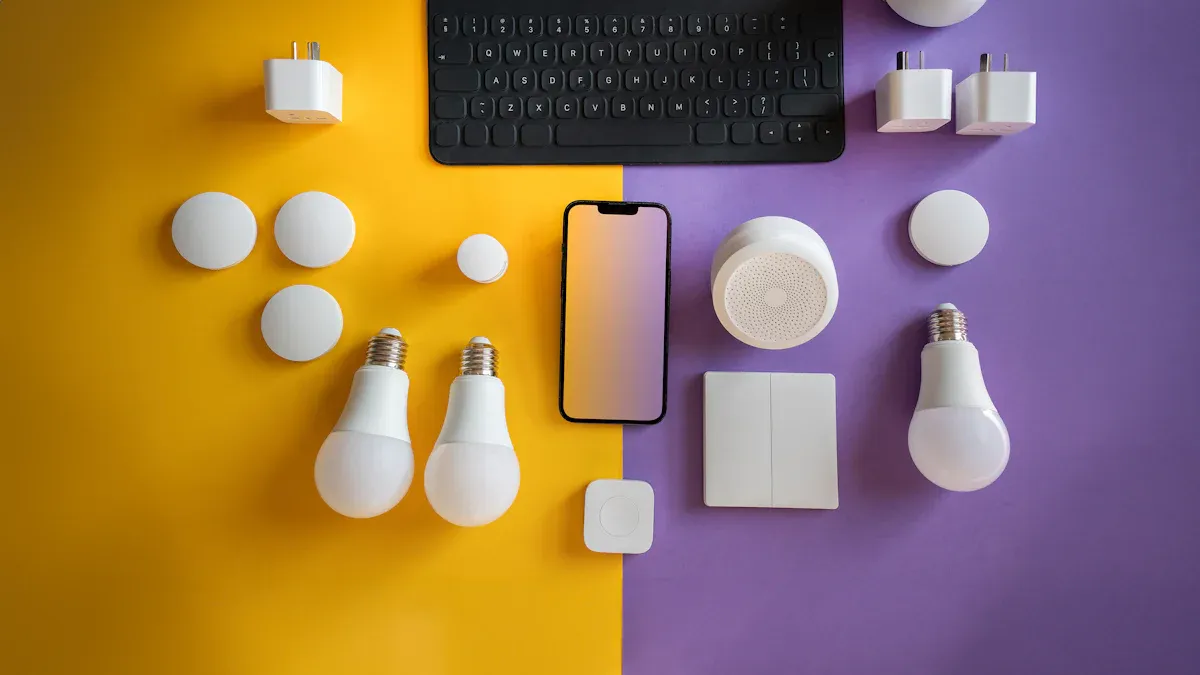
When I open a new box of solar wall lights, I always get excited to see what’s inside. Every package usually comes with all the essentials I need for a quick and easy setup. Here’s a handy table that shows the most common components I find in a standard solar wall light kit:
Component | Specification |
|---|---|
LED Chips | Osram SMD 3030 LEDs |
Lumen per watt | 160 Lumens |
Solar Panel | Premium 3.7V, 14.8Wh Monocrystalline Silicon |
Battery | 3.7V, 14.18Wh Li-Ion Battery |
Motion Detector | PIR Built-in |
Housing Materials | Die Casting Aluminum |
Lens | Polycarbonate Optical Lens |
IP Rating | IP44 + IK08 Outdoor Rated |
Finish | Heavy Duty Powder Coating |
Warranty | 1 Year Rock Solid Warranty |
I always check for these items before I start the installation. Most solar wall lights also include mounting hardware, such as screws, hooks, or adhesive stickers, and a simple instruction manual.
Before I get too far, I make sure to inspect every part for damage. I look for cracks in the lens, dents in the housing, or any loose wires. If I spot anything unusual, I contact the seller right away. I never want to install solar wall lights that might not work properly or could fail early. A quick inspection saves me time and frustration later.
Tip: I always keep the packaging until I finish installation. If I need to return or exchange anything, having the original box makes the process much easier.
Understanding each part helps me get the most out of my solar wall lights. The LED chips provide bright, energy-efficient lighting. The monocrystalline solar panel charges the battery during the day. The built-in motion detector senses movement and turns the light on when needed. The die-cast aluminum housing and polycarbonate lens protect the light from weather and impacts. I trust the IP44 and IK08 ratings to keep my lights safe outdoors. The heavy-duty powder coating gives a sleek finish and extra durability.
When I know what each component does, I feel confident about the installation and long-term use. I always double-check that nothing is missing or damaged before moving on. This simple step ensures my solar wall lights will perform at their best and last for years.
Selecting the perfect spot for my solar wall lights always makes a huge difference in how well they work. I want to get the most out of every charge, so I pay close attention to where I install them. Here’s how I make sure my lights shine bright every night.
I always look for a place that gets plenty of direct sunlight. My experience tells me that solar wall lights need at least 6 to 8 hours of sun each day to charge fully. If I put them in a shady spot, the battery drains fast and the light fades quickly. I avoid areas under trees, roof overhangs, or next to tall fences. I check the spot at different times of the day to make sure nothing blocks the sun.
Tip: I test the location by watching how much sunlight hits the wall from morning to late afternoon. If I see shadows for most of the day, I pick a different spot.
I always aim to mount my solar wall lights on a wall that faces south. This direction catches the most sunlight throughout the day. If I can’t use a south-facing wall, I try east or west. These directions still get enough sun for good charging. I also like that many solar panels can tilt or rotate. I adjust the angle so the panel faces the sun directly. This small change boosts charging and keeps my lights bright.
I check if the wall faces south, east, or west.
I adjust the solar panel angle for maximum sunlight.
I avoid north-facing walls because they get less sun.
I never want anything to block the sunlight or interfere with the sensor. I keep my solar wall lights away from trees, gutters, or anything that casts a shadow. I also avoid placing them near bright streetlights or porch lights. Artificial light can confuse the sensor and stop the light from turning on at night. I always think about the purpose of my lights—whether I want to light up a path, boost security, or add some style to my yard. I pick a spot that matches my goal and keeps the light clear of obstacles.
Here’s a quick table I use to remember what matters most when picking a spot:
Factor | Description |
|---|---|
Maximizing Sunlight Exposure | I make sure the panel gets direct sun and stays out of the shade. |
Lighting Purpose | I decide if I want security, pathway, or accent lighting. |
Weather Conditions | I check if the spot is sheltered but still sunny. |
Terrain | I look for flat ground and avoid reflective surfaces that might cause glare. |
Testing and Adjusting | I watch the light for a few days and move it if needed. |
When I follow these steps, my solar wall lights always perform better. I get brighter light, longer run times, and fewer problems. I encourage everyone to take a few extra minutes to choose the right location. It pays off every night when my yard lights up just the way I want.
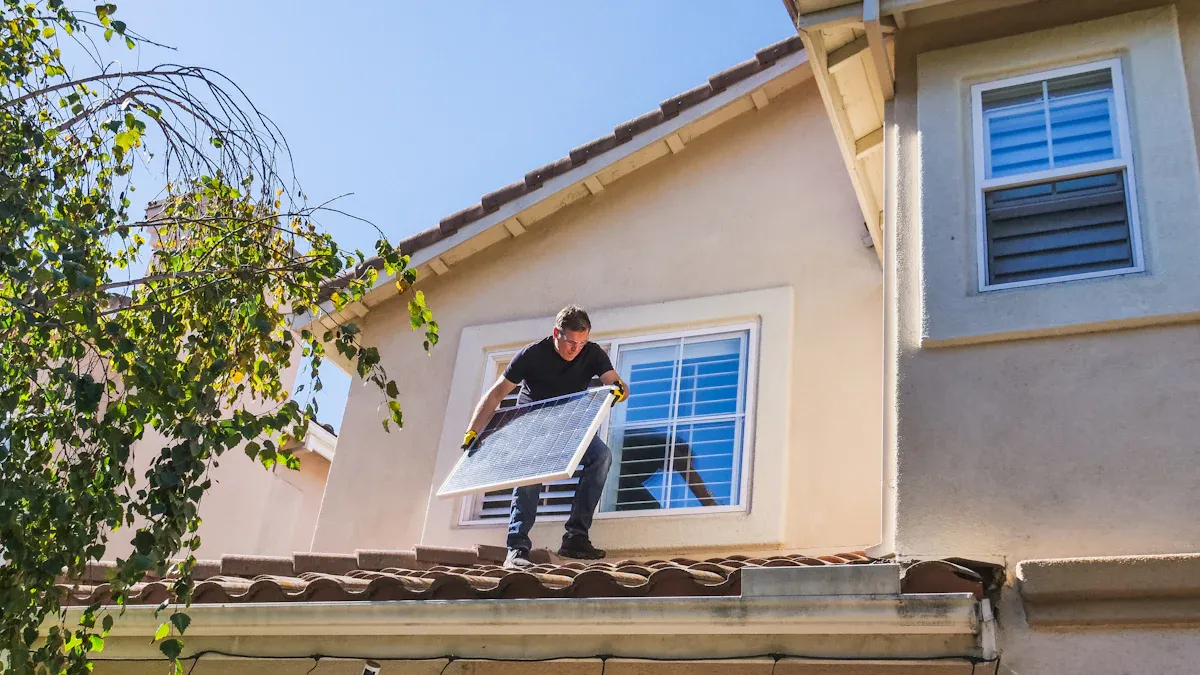
Getting the installation process right makes all the difference for solar wall lights. I always want my lights to last, shine bright, and work reliably. Let me walk you through the best ways to mount your lights and secure the wall mounted solar panel for maximum performance.
I always choose the mounting method that fits my wall type and the spot I picked. Each method has its own strengths. Here’s how I decide which one to use:
Screws give me the most secure hold. I use them when I want my solar wall lights to stay put, even in strong winds or heavy rain. I grab a drill, mark the holes using the included template, and drive the screws into brick, wood, or concrete. This method works best for permanent installations. I always double-check that the screws are tight and the fixture feels solid.
Tip: I wear gloves and non-slip shoes when drilling, especially if I need a ladder. Safety comes first.
Hooks offer a flexible option. I use them when I want to move my solar wall lights around or if I rent my home. I just screw the hooks into the wall and hang the light. This method works well for lighter models and areas where I might want to adjust the position later. I make sure the hooks are strong enough to hold the weight of the light.
Stickers or adhesive pads make the installation process fast and tool-free. I use them on smooth, clean surfaces like painted walls or glass. I peel off the backing, press the light firmly, and hold it for a few seconds. This method works best for temporary setups or places where I can’t drill holes. I avoid using stickers on rough or damp surfaces because they might not stick well.
Mounting Method | Best For | Tools Needed | Durability |
|---|---|---|---|
Screws | Permanent installs | Drill, screwdriver | High |
Hooks | Flexible placement | Screwdriver | Medium |
Stickers | Quick, no-drill setups | None | Low/Medium |
No matter which method I choose, I always check that the light feels secure before moving on.
The solar panel is the heart of my solar wall lights. If I want bright led lights every night, I need to position the panel for maximum sunlight. I always follow these steps:
I face the solar panel toward true south if I live in the northern hemisphere. This direction captures the most sunlight all year.
I adjust the tilt angle to match my latitude. For example, if I live at 35 degrees latitude, I tilt the panel about 35 degrees.
I tweak the angle by 15 degrees up in winter and 15 degrees down in summer. This small change helps the panel soak up more sun as the seasons change.
I use adjustable mounts if my solar wall light has them. These let me fine-tune the angle for the best results.
I check for shadows from trees, gutters, or nearby objects. Even a little shade can cut down charging power.
I leave enough space between lights so one panel doesn’t block another.
Note: I always plan my installation process during daylight hours. I ask a friend to help if I need to climb a ladder. I never rush, and I keep safety gear close by.
I make sure the solar panel sits tight and faces the right way. When I do this, my solar wall lights charge fully and my led lights shine bright all night. I trust this process because it gives me the best performance and the longest lifespan for my lights.
I always start by giving my solar wall lights a full charge before I use them. This step makes a huge difference in how well they perform. I place my solar wall lights in a spot that gets direct sunlight. I let them soak up the sun for several hours. Most solar wall lights need between 6 and 12 hours of sunlight to reach a full charge. I never skip this step because it helps the battery last longer and keeps the lights shining bright.
I set up my solar wall lights in direct sunlight.
I leave them to charge for at least 6 hours, but I aim for 12 hours if possible.
I check the weather forecast. If it’s cloudy, I know charging will take longer.
I always wait until the battery is fully charged before turning the lights on.
Charging times change with the seasons. I use this table to plan my setup:
Season | Charging Time |
|---|---|
Winter | 8-10 hours |
Spring | 6-8 hours |
Fall | 6-8 hours |
Even on cloudy days, my solar wall lights can still charge. I notice the efficiency drops to about 10–25% of normal, depending on how thick the clouds are. I always give my lights extra time to charge when the weather isn’t perfect.
Tip: I always charge my solar wall lights outside for their first use. This step helps the battery reach its full potential and gives me the brightest light.
Once my solar wall lights finish charging, I turn them on. Most models have a simple switch or button. I look for it on the back or side of the fixture. I press the button and watch for the LED to light up. If nothing happens, I double-check the battery and make sure the solar panel faced the sun during charging.
I always read the instruction manual before powering on. Some solar wall lights have different modes, like motion detection or dusk-to-dawn. I pick the mode that fits my needs. I want my lights to turn on automatically at night, so I choose the dusk-to-dawn setting.
I find the power switch.
I turn the solar wall lights on.
I select my preferred lighting mode.
I always check the battery level before I rely on my solar wall lights. Some models have a small indicator light. Others need a quick test at night. I cover the solar panel with my hand to simulate darkness. If the light turns on, I know the battery has enough charge.
If my solar wall lights seem dim or don’t turn on, I repeat the charging process. I make sure the solar panel is clean and free from dust. I move the light to a sunnier spot if needed. I want my solar wall lights to work every night, so I never skip these checks.
Note: I check the battery every few weeks, especially after cloudy weather or long periods of rain. This habit keeps my solar wall lights reliable and bright.
I always follow these steps for charging and setup. My solar wall light works best when I give it a strong start. I encourage everyone to take the time for proper charging and setup. You will see brighter light, longer battery life, and fewer problems.
Setting up the sensor and light features on my solar wall lights makes a huge difference in how well they work. I always take time to adjust these settings so I get the best performance and energy savings. Let me show you how I do it.
I rely on motion detection to keep my outdoor spaces safe and bright. Most solar wall lights use sensors that spot movement and turn the light on only when needed. This saves power and keeps my yard lit up when someone walks by. I notice that different models use different sensor technologies. Some use passive infrared (PIR) sensors. These work well and use very little energy, but they may not detect movement through walls or thick bushes. Others use microwave sensors. These can sense movement even through obstacles, but they use more power. Some advanced solar wall lights combine both types for better coverage.
I always check the sensor range and angle before I install my lights. For my porch, I pick a model with a 12-meter sensor. This gives me focused detection and avoids false triggers. For my driveway, I choose a light with an 18-meter sensor. This covers a larger area and keeps my property secure. Some models can detect movement up to 50 feet away, which is perfect for bigger yards.
If you want to maximize security, pick solar wall lights with a longer detection range and wider angle. For smaller spaces, a shorter range works best and saves energy.
Choosing the right lighting mode helps me get the most out of my solar wall lights. I usually find three main modes:
Dim mode: The light stays on at a low brightness all night. This saves energy and gives a gentle glow.
Bright on motion: The light stays off or dim until it senses movement. Then it switches to full brightness for a set time.
Always-on low light: The light stays on at a steady, low level from dusk to dawn.
I like to use the bright on motion mode for security. It only lights up when someone walks by, which scares off intruders and saves battery life. For pathways, I use dim mode so I can see where I’m going without wasting energy. I switch to always-on low light when I want my garden to look nice all night.
Solar wall lights combine solar power and motion sensing to boost efficiency. I notice my battery lasts longer when I use motion-activated modes. I always read the manual to find out how to change modes. Some models have a button or switch. Others use a remote control.
Try different modes to see which one fits your needs. You can always change the setting later if you want more light or better energy savings.
Adjusting the sensitivity and brightness helps me get the perfect balance between security and energy use. I start by making sure my solar wall lights get plenty of sunlight. A clean, sunny panel means the battery charges fully and the light stays bright.
Most solar wall lights let me adjust the sensor sensitivity. I use a dial or switch, following the instructions from the manufacturer. I set the sensitivity high if I want the light to turn on for every movement. I lower it if I get too many false alarms from passing cars or animals.
I also test the lights after making changes. I walk around the area at night to see how the sensor reacts. If the light turns on too often or not enough, I tweak the settings again. I adjust the brightness to match my needs. For security, I use full brightness. For ambiance, I lower the brightness to save power.
Here’s a quick table to help you remember what to check:
Setting | How I Adjust It | Why It Matters |
|---|---|---|
Sensitivity | Dial or switch | Controls when light turns on |
Brightness | Button or remote | Saves energy or boosts light |
Sunlight | Clean panel, sunny spot | Keeps battery charged |
I always test my solar wall lights after every adjustment. This way, I know they work exactly how I want, no matter the season or weather.
When I take time to set up motion detection, choose the right mode, and adjust sensitivity, my solar wall lights work smarter and last longer. I encourage you to experiment with these settings. You’ll see brighter lights, better security, and real energy savings.
I love how solar wall lights make my life easier with their automatic features. Every evening, I watch them turn on by themselves as soon as the sun goes down. I never have to flip a switch or worry about forgetting to turn them off. These lights use a smart sensor that detects motion within a wide area, so I always feel safe when I walk outside at night. The built-in battery stores enough energy during the day to keep my yard bright all night. I rely on three different lighting modes to match my needs, whether I want constant light, motion-activated brightness, or energy-saving dim light.
Here’s a quick table that shows how these features work together:
Feature | Description |
|---|---|
Motion Detection | Senses movement up to 5 meters with a 120° range |
Lighting Modes | Three options for energy efficiency and security |
Battery | High-performance battery for long-lasting illumination |
Solar Panel | Efficient panel absorbs sunlight for fast charging |
Brightness | Delivers up to 2000 lumens for clear visibility |
Charge Time | Fully charges in about 7 hours for all-night operation |
I trust solar wall lights to handle outdoor lighting automatically, so I can focus on enjoying my evenings.
To keep my solar wall lights shining bright, I make cleaning the solar panel a regular habit. Dust, pollen, and leaves can block sunlight and reduce charging power. I notice a big difference in brightness when I keep the panel clean. I always check the manufacturer’s instructions before I start. I brush off loose dirt first, then use a garden hose with a gentle spray. I avoid harsh chemicals and rough sponges because they can scratch the panel. If I use hard water, I squeegee the panel dry to prevent spots.
I recommend cleaning the panel early in the morning or on a cloudy day. This prevents streaks and keeps the panel cool.
If my solar wall lights are mounted high or in a tricky spot, I sometimes hire a professional for safety. Clean panels mean more energy, brighter lights, and better performance every night.
I want my solar wall lights to last for years, so I pay close attention to battery care. I check the battery compartment every month for signs of damage or corrosion. If I see any rust or leaking, I replace the battery right away. I always use high-quality rechargeable batteries that match the light’s specifications. This keeps the lights running smoothly and prevents sudden failures.
I check the battery regularly.
I replace old batteries with new, compatible ones.
I use only rechargeable batteries designed for solar wall lights.
A healthy battery means reliable lighting and peace of mind. I never ignore battery care because it protects my investment and keeps my outdoor space safe.
By following these simple steps, I make sure my solar wall lights work automatically, stay bright, and last longer. I encourage everyone to add these habits to their routine for the best results.
I always adjust my solar wall light routine as the seasons change. Each season brings new challenges for outdoor lighting. I want my lights to shine bright all year, so I follow a few simple tips that make a big difference.
Spring
Spring brings longer days and more sunlight. I use this time to check my solar wall lights after winter. I clean the panels and remove any dirt or pollen. I inspect the batteries for signs of wear. If I see any corrosion, I replace the batteries right away. I also trim back bushes or tree branches that might block sunlight. Spring is the perfect time to test all the settings and make sure the motion sensors work well.
Summer
Summer gives me the most sunlight. My solar wall lights charge quickly and stay bright all night. I still check the panels every few weeks for dust or bird droppings. I wipe them clean with a soft cloth and water. I also watch for heat buildup. If the lights get too hot, I move them to a spot with some afternoon shade. This keeps the batteries from overheating and extends their life.
Fall
In fall, the days get shorter and leaves start to fall. I clear away any leaves or debris from the solar panels. I check the angle of the panels and tilt them up a bit to catch the lower sun. I also test the lights more often because cloudy days can affect charging. If I notice the lights getting dim, I give them extra time to charge or move them to a sunnier spot.
Winter
Winter is the toughest season for solar wall lights. Snow, ice, and short days can cut down charging power. I brush off snow and ice from the panels after every storm. I tilt the panels to a steeper angle so snow slides off more easily. I also reduce the brightness or switch to motion-only mode to save battery life. If I live in a place with very little winter sun, I bring the lights inside for a few weeks or use a backup battery.
Tip: I set a reminder on my phone to check my solar wall lights at the start of each season. Regular care keeps them working their best.
Here’s a quick table I use to remember my seasonal tasks:
Season | What I Do | Why It Matters |
|---|---|---|
Spring | Clean, inspect, trim plants | Boosts charging and safety |
Summer | Clean, check for heat, adjust spot | Prevents overheating |
Fall | Remove leaves, tilt panel, test | Maximizes sunlight capture |
Winter | Clear snow, steepen tilt, save power | Keeps lights running longer |
I follow these seasonal tips every year. My solar wall lights stay bright, reliable, and efficient. I encourage you to do the same. You will see better performance and get the most out of your investment, no matter the weather.
Even the best solar wall lights can run into problems. I have faced a few issues myself, but I always find a solution with a little patience and the right steps. Let me walk you through the most common problems and how I fix them.
When my solar wall lights stop working, I do not panic. I start by checking the basics. Sometimes, the light sensor gets dirty or blocked by dust. I clean it gently with a soft cloth. If the light still does not turn on, I test it in complete darkness. Artificial lights nearby can confuse the sensor, so I move the fixture away from streetlights or porch lights.
Water can also sneak into the housing, especially after heavy rain. I check for any signs of moisture inside the light. If I find water, I dry the unit and seal any gaps. I always use lights with a good IP rating to prevent this problem.
Batteries wear out over time. I open the battery compartment and look for corrosion or leaks. If the battery looks old or damaged, I replace it with a new rechargeable one. Sometimes, the settings get mixed up. I reset the timer and mode settings by following the manual. If my light has a reset button, I hold it for about 10 seconds. For models without a button, I quickly flip the power switch three times. After resetting, I let the light charge in direct sunlight for at least eight hours.
Here’s a table I use to troubleshoot quickly:
Issue | What I Do |
|---|---|
Dirty Sensor | Clean with a soft cloth |
Water Damage | Dry the unit, seal gaps, use weatherproof covers |
Dead Battery | Replace with a new rechargeable battery |
Wrong Settings | Reset timer and mode, follow manual instructions |
If the sensor on my solar wall lights does not pick up movement, I check for dirt or spider webs covering the sensor. I clean it and make sure nothing blocks its view. Sometimes, bright lights nearby interfere with the sensor. I move the light to a darker spot or shield it from artificial light.
If the sensor still acts up, I reset it. I press and hold the reset button, or I remove the battery for a minute before putting it back. After that, I let the light recharge in the sun. I also check the wiring connections if the sensor is built-in. A loose wire can cause the sensor to fail.
When my solar wall lights look dim, I know something is wrong. I start by cleaning the solar panel. Dust and leaves block sunlight and reduce charging power. I check the battery next. If the light flickers or stays dim, I swap in a fresh battery.
Sometimes, the problem comes from poor connections inside the light. I tighten any loose wires. If the area is too large for one light, I add more solar wall lights to boost brightness. I also try placing reflective surfaces nearby to help direct more light where I need it.
If I want even more brightness, I upgrade to a model with a bigger solar panel or a higher-capacity battery. I always make sure my lights are in a sunny spot and not shaded by trees or buildings.
Tip: Regular cleaning and battery checks keep my solar wall lights shining bright and reliable every night.
I get the best results from solar wall lights when I follow a few key steps:
Mount each solar wall light securely and angle the panel for sunlight.
Test and adjust settings after installation.
Clean panels and inspect batteries often.
Use weatherproof covers and store lights indoors during harsh weather.
Regular checks and cleaning keep my solar wall lights bright and reliable.
Benefit | Description |
|---|---|
Energy Savings | I save up to 75% on energy compared to old lights. |
Lower Carbon Footprint | I use clean energy and help the planet. |
Long-term Savings | Fewer replacements mean more money in my pocket. |
Switching to solar wall lights gives me peace of mind, savings, and a greener home.
I usually let my solar wall light charge for 6 to 12 hours in direct sunlight. I check the weather forecast before setting it up. Cloudy days may require extra charging time.
I do not recommend installing it indoors. The solar panel needs direct sunlight to work. I always choose an outdoor spot with plenty of sun.
I clean the solar panel and sensor. I check the battery and replace it if needed. I reset the light using the instructions. I make sure the panel faces the sun.
Most models have a button, dial, or remote. I follow the manual to change settings. I test the light at night and adjust until I get the results I want.
My solar wall light works in winter, but I see lower brightness on cloudy days. I clean snow off the panel and tilt it for better sunlight. I sometimes switch to motion-only mode to save power.
I usually replace the battery every 1 to 2 years. I check for corrosion or leaks. I use only rechargeable batteries designed for solar wall lights.
Yes! I install several lights to cover large areas. I space them out so each panel gets enough sunlight. My yard looks brighter and feels safer.


 English
