Views: 0 Author: Site Editor Publish Time: 2025-10-15 Origin: Site


Do cheap LED grow lights actually work? I have tested many options for indoor gardening, and I found that results depend on your plants and growing space. For example, leafy greens and seedlings thrive under a led grow light placed close to the foliage. I use the table below to show how different lights perform:
Light Type | Effectiveness | Placement Distance | Notes |
|---|---|---|---|
Incandescent | Low | 24 inches | Least efficient, high heat output |
Fluorescent | Moderate | 12 inches | Wide spectrum, low heat |
LED | High | 6 inches | Energy efficient, adjustable spectrum |
Cheap LED grow lights can effectively support seedlings and low-light plants when placed close to the foliage.
Full-spectrum LED lights provide a balanced mix of wavelengths, promoting healthy plant growth and flowering.
While cheap lights are budget-friendly, they may have lower efficiency and shorter lifespans compared to expensive models.
For larger gardens or demanding plants, investing in higher-quality LED lights ensures better coverage and consistent results.
Always check for safety certifications like UL or ETL to ensure the lights meet electrical safety standards.
Regular maintenance, such as cleaning and inspecting lights, helps maintain performance and plant health.
When choosing a light, consider actual wattage and PPFD ratings instead of relying on advertised claims.
For small projects or beginners, cheap LED grow lights offer a cost-effective way to start indoor gardening.
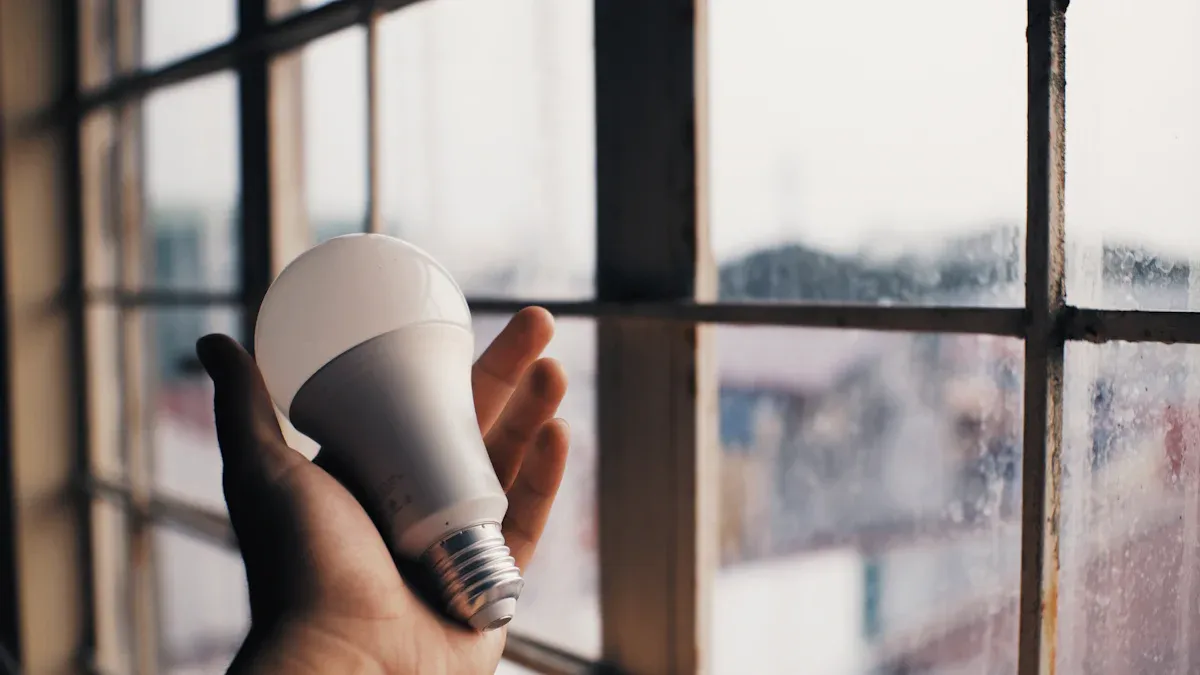
When I started growing plants indoors, I quickly learned that not all light is equal for plant growth. A led grow light uses light-emitting diodes to produce the specific wavelengths that plants need for photosynthesis. These lights focus on providing PAR, or Photosynthetically Active Radiation, which is the range of visible light that plants use to make food.
Here’s how a led grow light supports indoor gardening:
The light comes from passing an electric current through a semiconductor, which creates visible light.
The color of the light depends on the materials inside the semiconductor and the amount of electricity used.
I can adjust the light output to match the needs of my plants at different stages, such as seedlings or flowering.
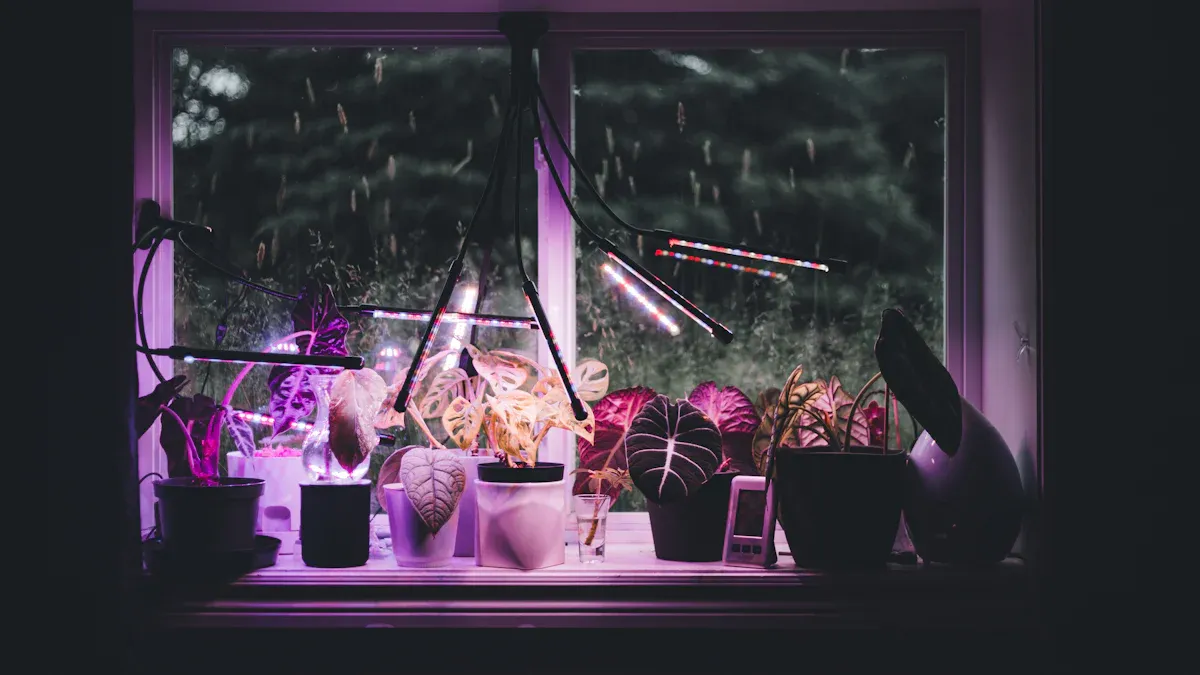
Many modern models offer a full-spectrum bulb or full-spectrum led, which mimics natural sunlight and helps plants grow strong and healthy.
I have found that using a led grow light with a full-spectrum bulb gives my plants a balanced mix of red, blue, and white light. This combination encourages leafy growth and supports flowering when needed.
When I compare cheap and expensive led grow lights, I notice several important differences. The price often reflects the build quality, efficiency, and lifespan of the light.
Feature | Cheap LED Grow Lights | Expensive LED Grow Lights |
|---|---|---|
Build Quality | Basic materials, lighter case | Sturdy, often metal housing |
Efficiency | Lower, more heat produced | Higher, less energy wasted |
Lifespan | Shorter, may need replacing | 50,000-100,000 hours, long-term |
Light Output | Can fade over time | Maintains brightness for years |
Spectrum Options | Limited, sometimes only red/blue | Full-spectrum, adjustable |
From my experience, cheap led grow lights can work for small projects or low-light plants. However, they often waste more energy as heat and may not last as long. Expensive models cost more upfront, but they save money over time because they use less electricity and rarely need replacement. In industrial settings, I have seen expensive lights last for years, even under tough conditions.
Tip: If you want to start with a small indoor garden, a cheap led grow light might be enough. For larger or long-term projects, investing in a higher-quality full-spectrum led pays off in the long run.
I have started many indoor seed starting projects using cheap led grow lights. For seedlings and low-light plants, these lights often deliver solid results. I noticed that leafy greens, herbs, and houseplants with modest light needs respond well when I keep the fixture close to the foliage. Many gardeners use shop lights for seedlings because they provide enough intensity for early growth stages.
Researchers reviewed over 120 studies and found that LED lighting improved energy use efficiency for many vegetables and herbs. Some plants, like strawberries, showed a huge boost in growth rates under LEDs, while others, such as sweet peppers, had smaller gains. This tells me that plant species matter a lot when choosing a led grow light.
When I check performance, I look at a few key metrics:
PPFD (Photosynthetic Photon Flux Density): This measures the light intensity that reaches the plant canopy. Seedlings need 200-400 µmol/m²/s, which most cheap led grow lights can provide if placed close.
Efficacy: This shows how well the light turns electricity into usable light for plants.
Cost per micromole: This helps me compare the economic value of different lights.
Tip: For seedlings and shade-loving plants, a basic led grow light can be a cost-effective solution. I always keep the light within 6 inches of the leaves for best results.
I have set up several small-space gardens using affordable led grow lights. In tight areas, these lights often perform surprisingly well. I tracked yields from different fixtures and found that even lower-cost models can produce a few ounces of greens or herbs per harvest cycle.
Here’s a table showing average yields from various lights in small gardens:
LED Grow Light | Average Yields |
|---|---|
Spider Farmer SF-1000 | 5-10+ oz |
Spider Farmer SF-2000 | 14-24 oz+ |
HLG Blackbird | 7-12+ oz |
Other unspecified lights | 2-4+ oz |
I noticed that the cheapest lights usually fall into the "other unspecified lights" category. They still deliver a couple of ounces per cycle, which works for personal use or hobby gardening. I always check the PPFD and efficacy ratings before buying, since these numbers tell me how much usable light my plants will get.
Note: Small spaces make it easier to maintain the right light intensity. I can move the fixture closer or further away as needed.
When I tried to expand my indoor garden, I ran into the limits of cheap led grow lights. For larger setups, these lights often struggle to provide enough coverage and intensity. I found that I needed to buy multiple units to cover a bigger area, which increased my costs and made the setup more complicated.
Horticultural experts point out a few common issues:
Initial cost seems low, but cheap lights may not last as long or run as efficiently. Over time, I ended up spending more on replacements and electricity.
Quality varies a lot. Some budget lights do not deliver enough PPFD for dense plantings or flowering crops.
Inconsistent spectrum and output can lead to uneven growth across the garden.
I learned that for larger or more demanding gardens, investing in higher-quality led grow lights pays off. These models offer better efficiency, longer lifespan, and more consistent results.
If you want to scale up, consider the long-term value and reliability of your lighting choice.
When I started using cheap LED grow lights, I noticed several benefits right away. The most obvious advantage is the low price. Many budget models cost less than $100, making them accessible for beginners or anyone on a tight budget. I often see people in gardening forums mention how these lights help them get started without a big investment.
Here’s a table that shows what users often say about their experiences:
Cost | Wattage Claim | User Experience |
|---|---|---|
$78.00 | 1000W (actual 400-500W) | Increased brightness in grow area, straightforward design, helped second plant. Worth it for small areas with good ventilation. |
$85.00 | 1000W (actual 600W) | Opened eyes to real LED grow lights, absolutely worth it. |
$60-$70 | 600W (actual 250-300W) | OK option for cash-strapped growers wanting to grow a single plant, but not the best choice overall. |
I find these lights work well for small spaces or single plants. They often come with simple controls and lightweight designs, which make setup easy. I can move them around or adjust the height without much trouble. For seedlings, herbs, or leafy greens, a cheap led grow light can deliver enough brightness to support healthy growth.
Tip: If you want to experiment or grow just a few plants, these lights offer a risk-free way to learn.
Despite the low cost, I have run into some drawbacks when using cheap LED grow lights. The most common issue is limited coverage. I often need to buy more than one unit to light a larger area, which increases the total cost. Some models also produce more heat than expected, so I have to monitor the temperature in my grow space.
Here are the main disadvantages I have seen:
High initial cost compared to traditional bulbs, even for budget models.
Coverage limitations mean I need extra units for bigger gardens.
Heat output can affect plant health if I do not ventilate the space.
Technology and quality vary a lot, so I have to research before buying.
Incorrect use can cause light stress or bleaching in plants.
I always check reviews and look for consistent performance before choosing a new light. Some units claim high wattage, but the actual output is much lower. This can lead to disappointment if I expect more than the light can deliver.
Using cheap LED grow lights comes with a few risks that I cannot ignore. Insufficient light intensity sometimes leads to slow growth or weak plants. Uneven light distribution can cause some plants to stretch while others stay short. I have seen leaves burn when the fixture sits too close or runs too hot.
Electrical safety is another concern. I always make sure my lights have built-in protections like overheat sensors or automatic shutoff features. I check cords and outlets regularly to avoid water hazards or fire risks. If a light flickers or changes color, I replace it right away to protect my plants.
Humidity control matters, too. Excess heat from the lights can dry out the air, so I monitor moisture levels closely. Over time, I notice that some cheap lights lose brightness, which affects plant growth. I stay alert for these changes and adjust my setup as needed.
When I select a led grow light, I always check the wattage and light intensity first. Wattage tells me how much power the light uses, but it does not always show how much usable light reaches my plants. Many cheap models advertise high wattage, but the actual output can be much lower. I learned to look for the PPFD (Photosynthetic Photon Flux Density) rating, which measures the amount of light that hits the plant canopy. Seedlings and leafy greens need less intensity, so a basic fixture often works if I keep it close. For fruiting or flowering plants, I need higher PPFD and sometimes multiple lights. I use a simple rule: the closer the light, the stronger the intensity. I avoid placing lights too far away, since weak light leads to slow growth and leggy stems.
Tip: I always check the manufacturer's specifications and user reviews to see if the light delivers enough intensity for my setup.
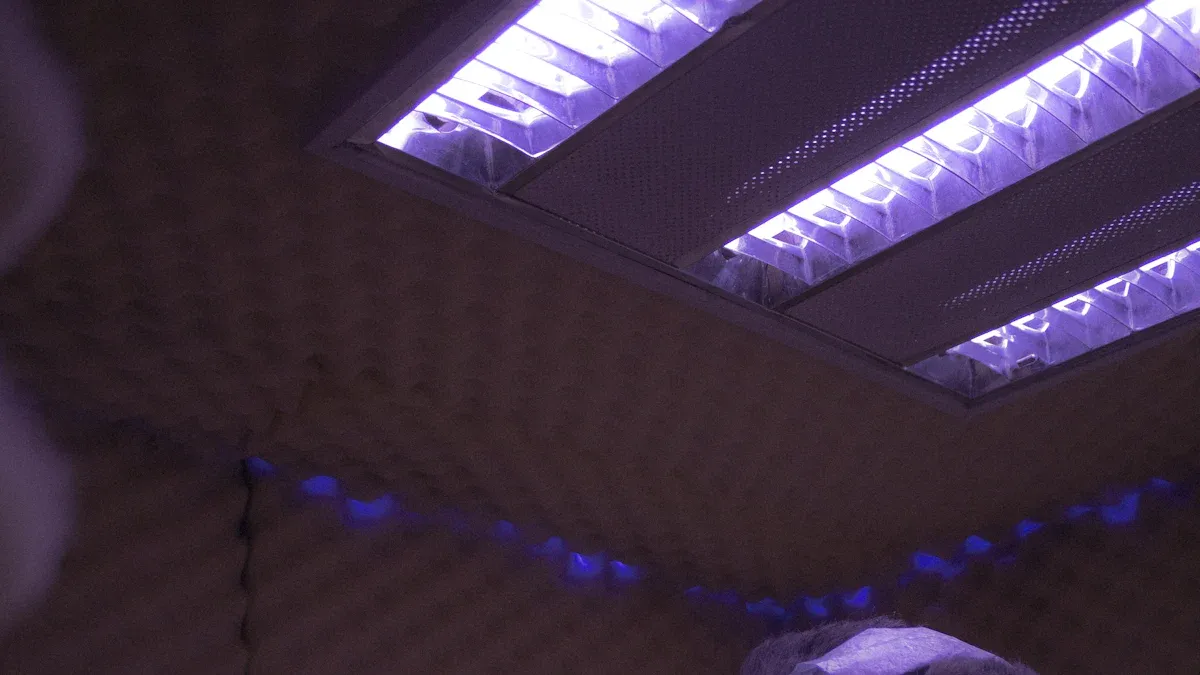
The spectrum and color quality of led grow lights play a huge role in plant development. I noticed that cheap lights often focus on red and blue wavelengths. These colors support photosynthesis and vegetative growth, but they do not always provide a balanced spectrum. Plants need a mix of wavelengths for healthy roots, strong stems, and vibrant leaves. I found that full-spectrum models mimic natural sunlight better and help my plants thrive.
Here is a table showing how different light spectrums affect plant growth:
Light Spectrum | Wavelength (nm) | Effect on Plants |
|---|---|---|
Blue Light | 400–500 | Promotes stomatal opening, supports healthy root and stem structure. |
Red Light | 600–700 | Encourages photosynthesis and vegetative growth, can cause overstretching alone. |
Far-Red/UV | N/A | Enhances growth and yield, improves flavor, color, and overall plant health. |
I always look for a led grow light that offers a balanced spectrum. When I use lights with only red and blue LEDs, I see plants stretch too much or develop pale leaves. Full-spectrum options give me better results, especially for flowering or fruiting crops.
Build quality and cooling matter more than most people realize. I have used cheap led grow lights with flimsy plastic cases and weak fans. These models heat up quickly and sometimes fail after a few months. Good cooling keeps the LEDs running at safe temperatures and extends their lifespan. I check for metal housings, sturdy construction, and built-in heat sinks. If the light runs hot, I add a small fan or increase ventilation in my grow space. Poor cooling leads to burned leaves and shortens the life of the fixture. I always inspect the unit before buying and read reviews to see if others had problems with overheating.
Note: Reliable build quality and cooling help me avoid costly replacements and keep my plants healthy.
When I shop for LED grow lights, I always check for safety certifications. These marks show that a product meets strict standards for electrical safety and fire prevention. I learned early that not every cheap LED grow light passes these tests. Some sellers skip certifications to cut costs, but I never risk my plants or my home.
I look for these common safety marks:
Certification | What It Means | Where To Find It |
|---|---|---|
UL | Tested for electrical safety | On the product label |
ETL | Meets North American standards | In the manual or box |
CE | Complies with EU regulations | On the packaging |
FCC | Limits electromagnetic interference | On the back of the unit |
I always check the label or the user manual before plugging in a new light. If I see UL or ETL, I feel confident that the product passed independent lab tests. CE and FCC are also good signs, especially for imported models.
Tip: I avoid lights that lack any safety certification. If a seller cannot show proof, I move on to another option.
I once bought a cheap LED grow light online. It arrived without any safety marks. I noticed the cord felt thin, and the plug looked flimsy. I decided not to use it. I did not want to risk an electrical fire or damage to my plants. Since then, I always check for certifications before buying.
Here is a quick checklist I use:
Look for UL or ETL marks on the product or packaging.
Read the manual for safety warnings and instructions.
Search for user reviews that mention overheating or electrical issues.
Ask the seller for certification documents if they are not visible.
Avoid products with missing or fake safety labels.
I trust certified lights to run safely for long hours. They usually have better wiring, stronger plugs, and built-in protections. I feel more comfortable leaving them on overnight. Certified products also help me meet insurance requirements for indoor gardening.
Some cheap LED grow lights claim high wattage or advanced features, but lack safety marks. I do not let flashy marketing distract me. I focus on safety first. I know that a certified light protects my plants, my home, and my peace of mind.
When I select a cheap led grow light, I always start by matching the light to my plants’ needs. Each plant species requires a different amount of light intensity and spectrum. I use a simple table to compare the most important criteria before making a decision:
Criteria | Description |
|---|---|
Actual Wattage | I check the real power draw, not just the advertised rating. |
PPFD Values | I measure how much light reaches the plant canopy. This helps me know if my plants get enough energy. |
Efficacy Ratings | I look for higher ratings, which show the light turns electricity into usable energy efficiently. |
Spectrum Type | I prefer full-spectrum systems for most plants. Targeted spectrums work better than basic white LEDs. |
Build Quality | I want durable construction so my light lasts through several growing cycles. |
For seedlings, I often use shop lights for seedlings because they provide enough intensity for early growth. When I grow leafy greens or herbs, I choose a fixture with a balanced spectrum and moderate PPFD. Fruiting plants need higher intensity, so I look for lights with strong efficacy ratings.
I rely on user reviews and certification labels to guide my choices. Reviews from other growers give me real-world feedback about performance and durability. I trust established brands because they usually offer better customer support and consistent quality. Certification labels like ETL or UL show the product meets safety standards. I always check the packaging or manual for these marks before plugging in a new light. If a product lacks certifications, I move on to another option. I read several reviews to spot patterns in reliability and effectiveness. This helps me avoid wasting money on poor-quality lights.
Tip: I never skip reading reviews. They reveal hidden issues and strengths that specs alone cannot show.
Many cheap LED grow lights come with misleading wattage claims. I learned to spot these tricks by comparing actual output and advertised numbers. Here is a table that highlights the most common misleading claims I see:
Misleading Claim | Explanation |
|---|---|
Higher wattage means more light output | A 100 watt light may produce less usable light than a 50 watt light if efficiency is lower. |
All LED bulbs of the same wattage perform equally | Two 3 watt bulbs can produce different amounts of light depending on quality and technology. |
Wattage includes only light output | Some manufacturers add fan wattage to the total, which inflates the numbers and misleads buyers. |
I always check the actual wattage and PPFD ratings instead of trusting marketing claims. I compare specs from different brands and read user feedback to confirm performance. I avoid lights that promise unrealistically high output for a low price. By focusing on real data and honest reviews, I find reliable options that fit my budget and my plants’ needs.
I often recommend cheap grow lights to beginners or anyone starting a small indoor garden. These lights work well for seedlings, herbs, or houseplants that do not need intense light. I use them in windowsills, on shelves, or in small grow tents. When I want to start seeds early in the season, a basic fixture gives me enough brightness to get strong sprouts. I also find them useful for propagating cuttings or keeping succulents healthy during winter.
Here are some situations where I reach for a budget-friendly light:
Growing a few trays of microgreens or lettuce.
Keeping a single tomato or pepper plant alive indoors.
Supplementing natural light in a dim room.
Experimenting with new plant varieties before investing in a larger setup.
Providing extra light for orchids or African violets.
I keep the fixture close to the plants, usually within six inches. This helps maximize the limited intensity. I also check the temperature often, since some cheap models run warm. For small projects, I do not need advanced features or high output. I focus on reliability and safety. If I see ETL or UL certification, I feel more confident using the light for long hours.
Tip: I always read user reviews before buying. Honest feedback from other growers helps me avoid unreliable products.
As my garden grows, I notice the limits of entry-level lights. Larger spaces, fruiting crops, or commercial projects need more power and efficiency. I look for signs that it is time to upgrade. If I see slow growth, uneven coverage, or high replacement costs, I consider a higher-quality fixture.
I use the table below to decide when to invest in better LED grow lights:
Factor | Description |
|---|---|
Energy Efficiency | Advanced LEDs use less power but deliver more light. This saves money on electricity bills. |
Long-term Cost Savings | Premium models last up to 50,000 hours. I replace bulbs less often and spend less over time. |
Lower Maintenance Costs | Fewer repairs and replacements mean less hassle and lower ongoing expenses. |
Reduced HVAC Needs | Efficient LEDs produce less heat. My grow room stays cooler, and I use less air conditioning. |
Less Water Usage | Plants lose less water under LEDs, so I water less often. |
Smaller Infrastructure | I can hang LEDs closer to plants. This lets me fit more plants in a smaller space. |
When I want consistent yields or plan to grow high-value crops, I choose a light with a strong warranty and proven performance. I also consider the total cost of ownership, not just the price tag. Over time, a quality fixture pays for itself through energy savings and fewer replacements.
Note: I always check for safety certifications and solid customer support before making a big investment.
I find that led grow lights with advanced features, like adjustable spectrum or smart controls, help me fine-tune my setup. These upgrades make sense when I want to scale up or maximize my harvests.
I see many new growers make the mistake of expecting a single cheap LED grow light to cover a large area. I used to think one fixture could handle all my plants, but I quickly learned that light intensity drops fast as you move away from the center. When I spread my plants too far apart, some started to stretch and turn pale. Succulents, in particular, suffered the most. They need strong, direct light to stay healthy. If the light does not reach the recommended PPFD—at least 100-200 μmol/s/m² for maintenance—plants will grow leggy and weak. I always check the manufacturer’s coverage chart and measure the distance from the light to the plant canopy. I avoid placing too many plants under one fixture, even if the box claims it can handle a big area.
Tip: I group my plants tightly under the brightest part of the light and rotate them every few days for even growth.
Getting the placement right makes a huge difference in plant health. I have made mistakes by hanging my lights too high or too low. When I placed the fixture too close, leaves burned and turned crispy. When I hung it too far, my plants stretched and lost color. I now start with the light higher and lower it gradually as my plants grow. I use adjustable hangers so I can fine-tune the height. I also use reflective materials like mylar or white paint on the walls to bounce light back onto the plants. This helps me get the most out of a budget fixture.
Here are my top placement strategies:
I position the light at a height that avoids burning but still gives enough intensity.
I adjust the height as plants grow taller.
I use adjustable hangers for flexibility.
I arrange lights and plants to avoid shadows and dark spots.
I watch my plants daily and move the light if I see signs of stress.
I learned that cheap LED grow lights need regular care to keep working well. I check my fixtures every week for dust, loose wires, or flickering. I clean the light surface so dust does not block the output. I also watch my plants for signs of trouble, like weak stems or slow growth. If I ignore maintenance, I notice a drop in yield and plant health. Sometimes, the light output drops, but the electricity bill stays the same. That means I pay more for less growth. Damaged cords or plugs can even create fire risks.
Here is my maintenance checklist:
Inspect fixtures for damage or wear.
Clean the light surface and growing area.
Monitor plant behavior for early signs of problems.
Replace any flickering or dim lights right away.
Note: Regular maintenance keeps my plants healthy and my grow space safe. I never skip these steps, even with budget lights.
After testing many options, I found that a cheap led grow light can work for seedlings or small projects. However, I noticed that low-cost models often lack intensity and efficiency, which can limit plant growth and yield. Experts recommend considering total costs, including energy and replacement. For best results, I match the light to my plant’s needs and always check for safety certifications. I encourage you to review your goals, budget, and space before making a choice.
I find that seedlings, leafy greens, herbs, and low-light houseplants thrive under budget LED grow lights. These plants need less intense light, so affordable fixtures usually meet their needs.
I keep the light 4–8 inches above the plant canopy. This distance gives enough intensity without burning the leaves. I adjust the height as the plants grow.
I have tried, but results vary. Most cheap LED grow lights lack the intensity and spectrum control needed for heavy flowering or fruiting. I use them mainly for vegetative growth or seedlings.
I always check for safety certifications like ETL or UL on the packaging or manual. Certified lights meet electrical safety standards and reduce fire risks.
Manufacturers sometimes list “equivalent” or inflated wattage. I look for actual power draw and PPFD ratings instead. These numbers show real performance.
Most budget LED grow lights use less power than traditional bulbs. I notice lower electricity bills when I switch from incandescent or fluorescent lights to LEDs.
In my experience, cheap models last one to three years with regular use. I check for signs of dimming or flickering and replace them when needed.
Yes, I often combine several fixtures to cover a larger area. I make sure each light overlaps slightly for even coverage and check that my outlets can handle the total load.


 English
